Tamil Character Recognition
A system for recognizing Tamil Handwritten characters in real time.
Description
Convolutional Neual Network (CNN) is trained to recognize Tamil handwritten characters. Then, the trained model is used with an interface to recognize characters in real time.
Dataset
The dataset is obtained from HP Labs India collected from native Tamil writers. There are about 156 characters with each character consisting of approximately 500 samples making the dataset about 82929 images in total. The dataset is available at HP Website or at this link. The characters available can be seen below,

Pre-Processing
-
The dataset is first downloaded and extracted.
-
To have a similar training dataset samples the following steps are done to each image.
- First, bouding box of the characters are obtained and using the bounding box, the white space around the chracters are trimmed off.
    def bbox(img1):
        img = 1 - img1
        rows = np.any(img, axis=1)
        cols = np.any(img, axis=0)
        rmin, rmax = np.where(rows)[0][[0, -1]]
        cmin, cmax = np.where(cols)[0][[0, -1]]
        return rmin, rmax, cmin, cmax

    rmin, rmax, cmin, cmax = bbox(img)
    trimmedImg = img[rmin:rmax, cmin:cmax]
- The
trimmedImgare of different resolutions, due to handwritten nature. Hence, they are made into a common resolution of 100 x 100 (average resolution).
resizedImg = cv2.resize(trimmedImg, dsize=(100, 100))
- Extra padding is added to the
resizedImgto make the resolution 128 x128.
    paddedImg = np.ones((128,128))
    paddedImg[14:114,14:114] = resizedImg
- The labels for each of the image are obtained from the file name.
label = int(fileName[:3])
- Finally, the images and labels are stored as pickle objects.
    filIm = open('./image_ALL_128x128.obj', 'wb')
    pickle.dump(images, filIm)
    filLab = open('./label_ALL_128x128.obj', 'wb')
    pickle.dump(labels, filLab)
The complete preprocessing code is available in TamilCharacterRecognistion_Preprocessing.ipynb.
Architecture
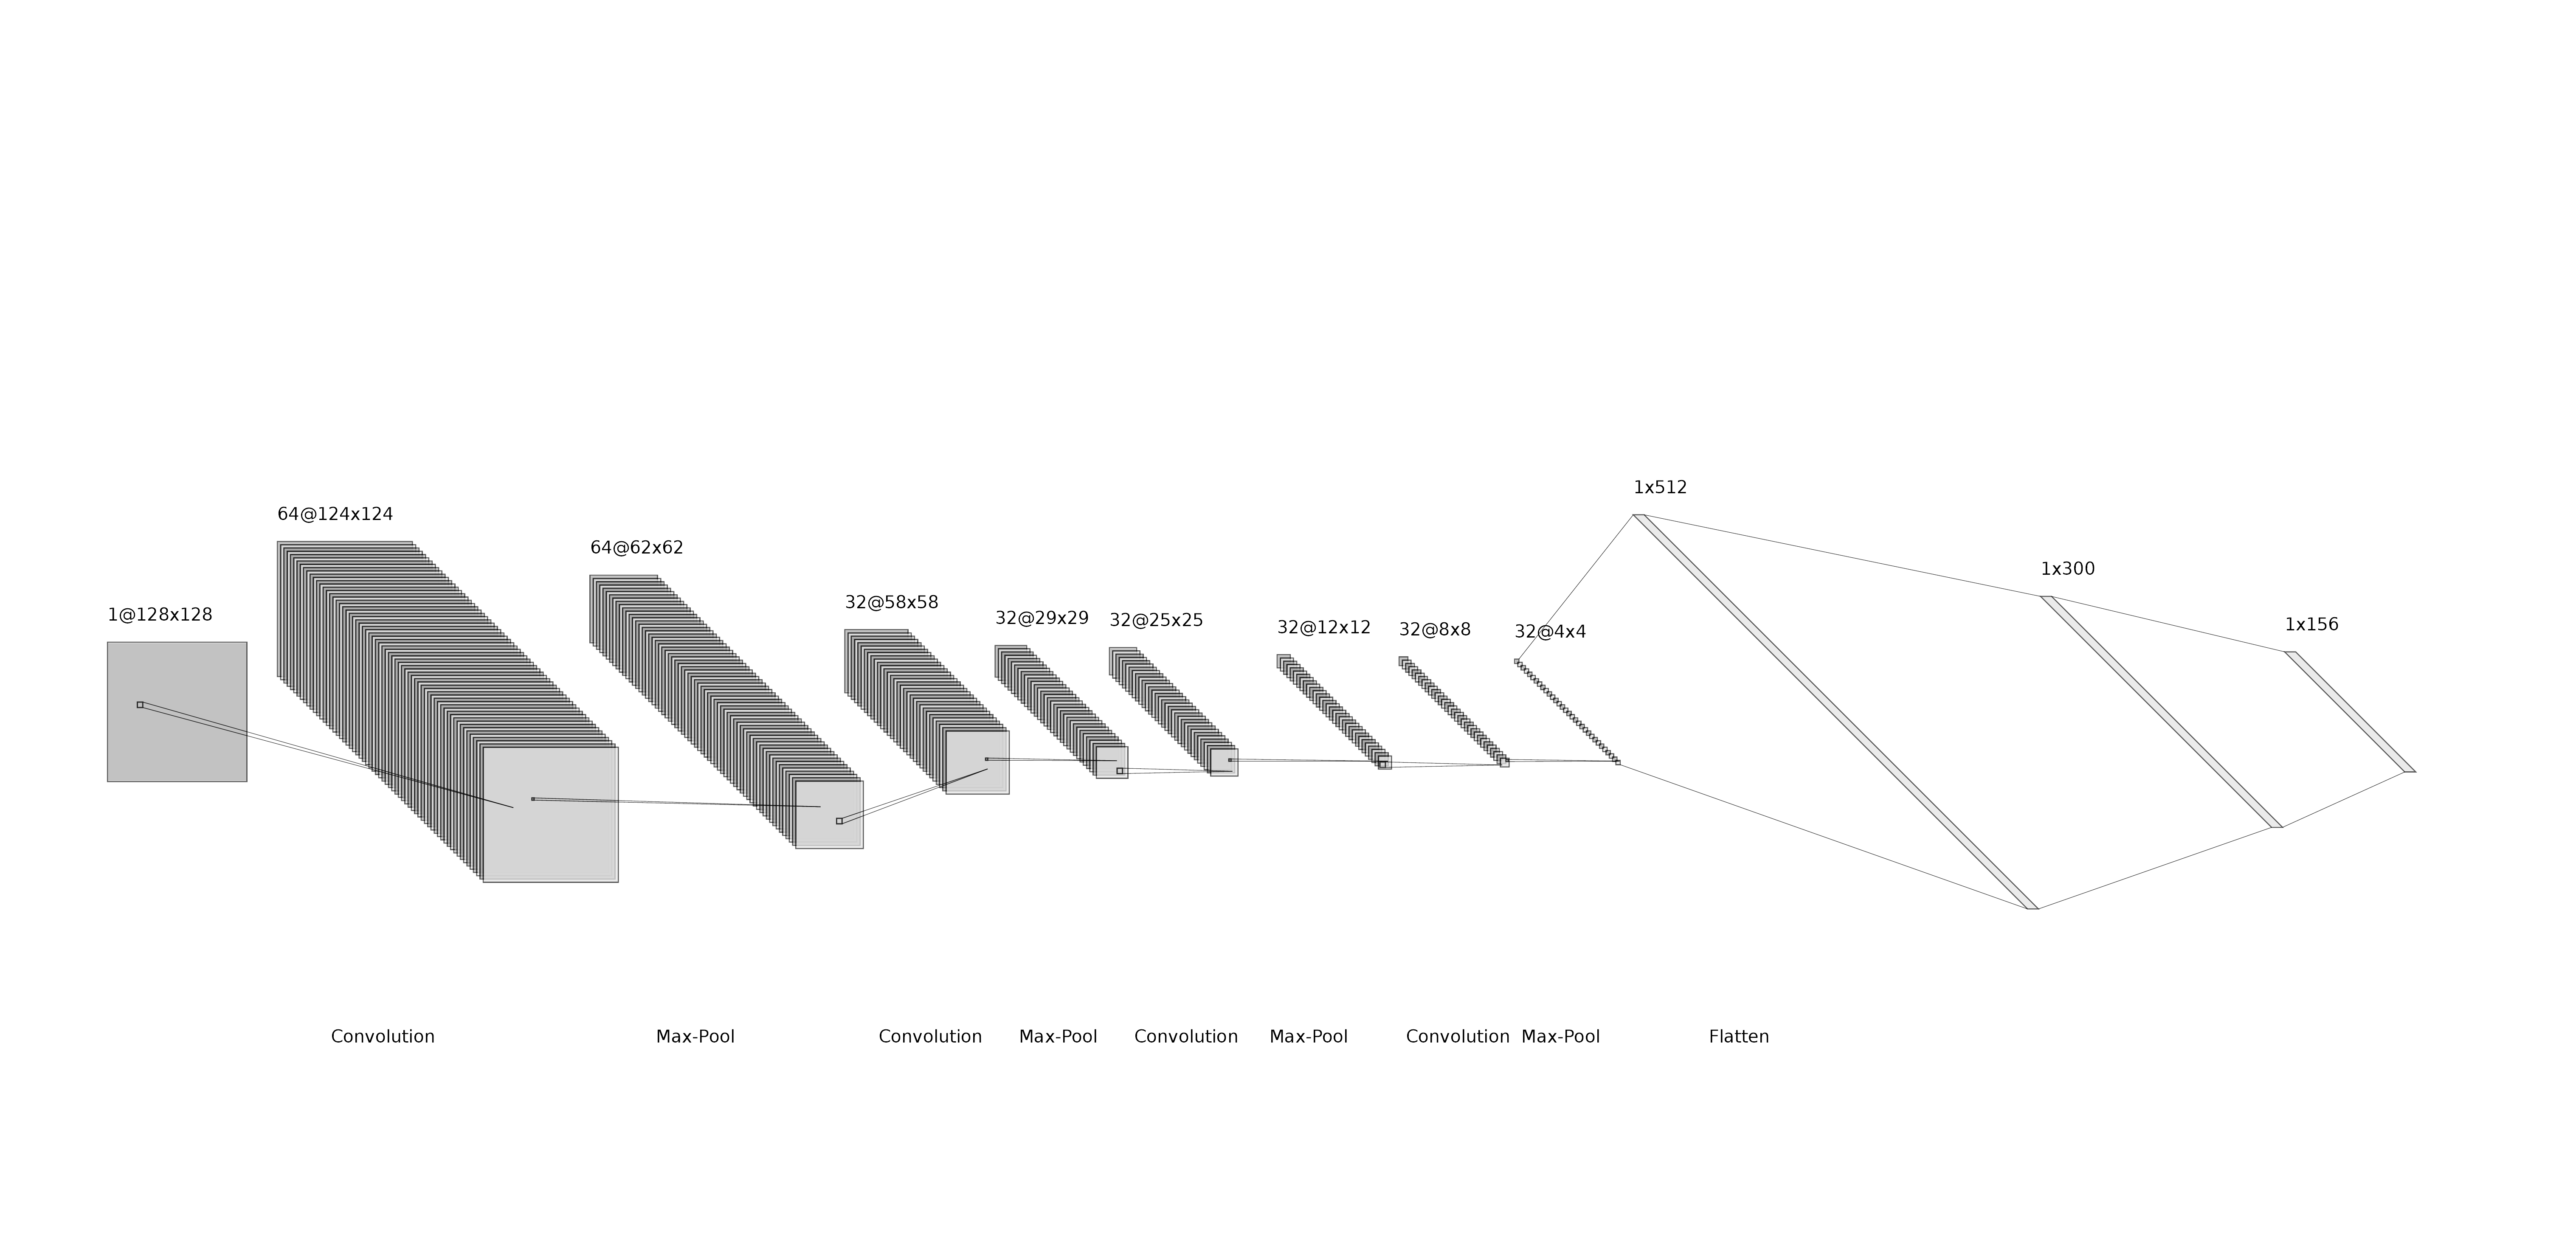
The architecture used is described below:

- Input Images taken from the dataset, reshape. The same images used and of size 128x128x1.
- Conv-1 The first convolutional layer consists of 64 kernels of size 5x5 applied with a stride of 1 and padding of 0.
- MaxPool-1 The max-pool layer following Conv-2 consists of pooling size of 2x2 and a stride of 1.
- Conv-2 The second convolution layer consists of 32 kernels of size 5x5 applied with a stride of 1 and padding of 0.
- MaxPool-2 The max-pool layer following Conv-2 consists of pooling size of 2x2 and a stride of 1.
- Conv-3 The third conv layer consists of 32 kernels of size 5x5 applied with a stride of 1 and padding of 0.
- MaxPool-3 The max-pool layer following Conv-3 consists of pooling size of 2x2 and a stride of 1.
- Conv-4 The fourth conv layer consists of 32 kernels of size 5x5 applied with a stride of 1 and padding of 0.
- MaxPool-4 The maxpool layer following Conv-4 consists of pooling size of 2x2 and a stride of 0.
- Flattening Layer The output of CNN is flattened to get 1x512 output.
- FC-1 (Dense Layer 1) The flattened output is fed to a hidden layer of 300 neurons.
- Output (Dense Layer 2) Finally, the output of hidden layer is fed to the output layer of 156 to get the final output.
| Input shape | Layer | Output shape |
|---|---|---|
| 128x128 | Convolution Layer- 64C5x5 | 124x124x64 |
| 124x124x64 | MaxPooling Layer - P2x2 | 62x62x64 |
| 62x62x64 | Convolution Layer - 32C5x5 | 58x58x32 |
| 58x58x32 | MaxPooling Layer - P2x2 | 29x29x32 |
| 29x29x32 | Convolution Layer - 32C5x5 | 25x25x32 |
| 25x25x32 | MaxPooling Layer - P2x2 | 12x12x32 |
| 12x12x32 | Convolution Layer - 32C5x5 | 8x8x32 |
| 8x8x32 | MaxPooling Layer - P2x2 | 4x4x32 |
| 4x4x32 | Flatten Layer | 1x512 |
| 1x512 | Hidden Layer | 1x300 |
| 1x300 | Output Layer | 1X156 |
The architectural description using Keras can be seen below:
model = Sequential()
model.add(Conv2D(64, (5, 5), input_shape=(w,h,1), activation='relu'))
model.add(MaxPooling2D(pool_size=(2, 2)))
model.add(Dropout(0.2))
model.add(Conv2D(32, (5, 5), activation='relu'))
model.add(MaxPooling2D(pool_size=(2, 2)))
model.add(Conv2D(32, (5, 5), activation='relu'))
model.add(MaxPooling2D(pool_size=(2, 2)))
model.add(Dropout(0.2))
model.add(Conv2D(32, (5, 5), activation='relu'))
model.add(MaxPooling2D(pool_size=(2, 2)))
model.add(Dropout(0.2))
model.add(Flatten())
model.add(Dense(256, activation='relu'))
model.add(Dense(numCategory, activation='softmax'))
model.summary()
model.compile(loss='categorical_crossentropy', optimizer='adam', metrics=['accuracy'])


# Model: "sequential_2"
# _________________________________________________________________
# Layer (type)                 Output Shape              Param #
# =================================================================
# conv2d_8 (Conv2D)            (None, 124, 124, 64)      1664
# _________________________________________________________________
# max_pooling2d_8 (MaxPooling2 (None, 62, 62, 64)        0
# _________________________________________________________________
# dropout_6 (Dropout)          (None, 62, 62, 64)        0
# _________________________________________________________________
# conv2d_9 (Conv2D)            (None, 58, 58, 32)        51232
# _________________________________________________________________
# max_pooling2d_9 (MaxPooling2 (None, 29, 29, 32)        0
# _________________________________________________________________
# conv2d_10 (Conv2D)           (None, 25, 25, 32)        25632
# _________________________________________________________________
# max_pooling2d_10 (MaxPooling (None, 12, 12, 32)        0
# _________________________________________________________________
# dropout_7 (Dropout)          (None, 12, 12, 32)        0
# _________________________________________________________________
# conv2d_11 (Conv2D)           (None, 8, 8, 32)          25632
# _________________________________________________________________
# max_pooling2d_11 (MaxPooling (None, 4, 4, 32)          0
# _________________________________________________________________
# dropout_8 (Dropout)          (None, 4, 4, 32)          0
# _________________________________________________________________
# flatten_2 (Flatten)          (None, 512)               0
# _________________________________________________________________
# dense_4 (Dense)              (None, 256)               131328
# _________________________________________________________________
# dense_5 (Dense)              (None, 156)               40092
# =================================================================
# Total params: 275,580
# Trainable params: 275,580
# Non-trainable params: 0
# _________________________________________________________________
Training and Testing
The dataset is split into training and testing data. About 85% of the total data i.e., 70k is given for the purpose of training the CNN Model and remaining 15% (Approximately 13k) will be given for the testing purpose. As the splitting of data increases for the Training, the performance efficiency of the Model will increases. One hot encoding is used for label encoding. The 156 character labels will be assigned to a 156x1 array.
X_train, X_test, y_train, y_test = train_test_split(images, y_labels, test_size=0.33, random_state=42)
y_labels=to_categorical(labels)
The training is done with a total of 70,498 data samples with 20 epochs. Each epochs consist of batch size of 100. The learning is done using adaptive learning rate with loss function of Categorical Cross Entropy.
model.fit(X_train, y_train, validation_data=(X_test, y_test), epochs=20, batch_size=100, verbose=1)The training and test accuracty is found to be 98.3 % and 92.29 % respectively.
The training model is then saved to be used in real time recognition.
model.save("./tamilALLEzhuthukalKeras_Model.h5")
print("Saved model to disk")
The process of model creation and training can be seen in TamilCharacterRecognistion_Training.ipynb.
Real Time Testing
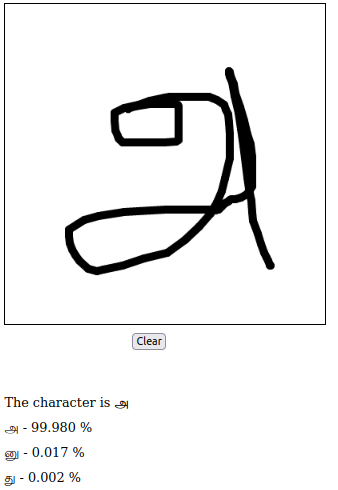
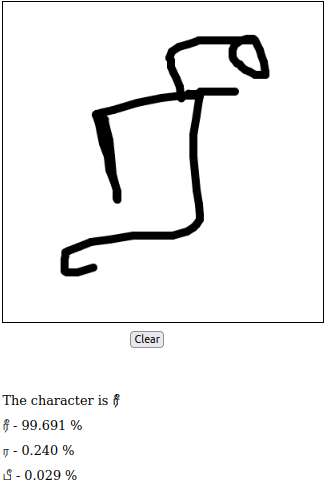
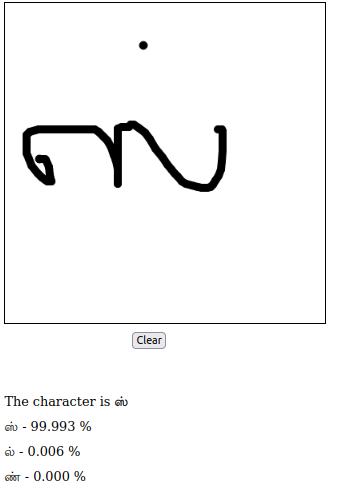
Real time testing is done with the help of Flask Application. A canvas is provided to draw the tamil characters using mouse. Then the recognized character will be visible below the canvas.


The complete source code is available here.